Introduction
If you are coming from Inkscape (or Illustrator), you are likely familiar with the Filter Editor. Powerful, albeit sometimes intimidating, window where you chain primitives like feDiffuseLighting and feSpecularLighting.
While the results in traditional tools are fantastic, the workflow can become rigid. In this post we’ll compare how Inkscape handles complex light filters versus the procedural approach in AnimGraphLab.
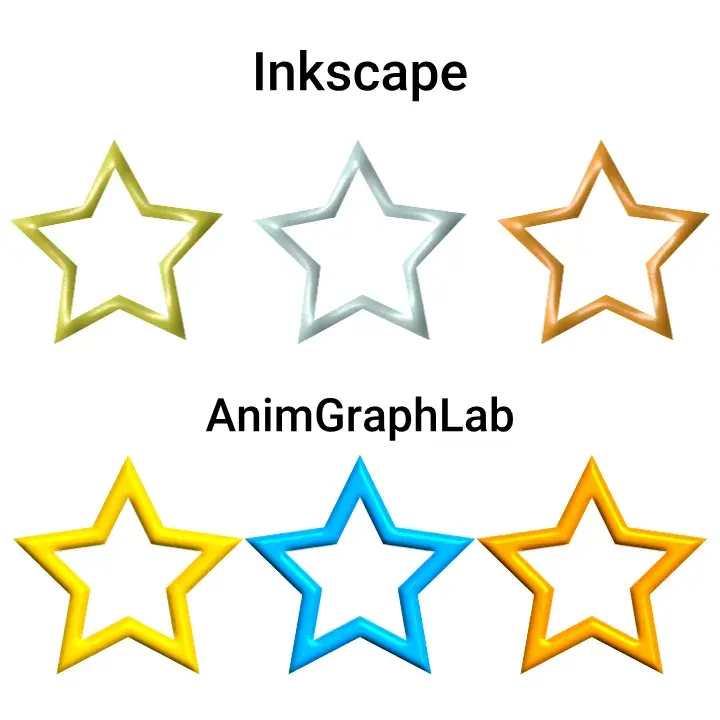
Inkscape approach
In Inkscape, creating a metallic or highlight look usually involves opening Filter Editor. You stack primitives, adjust azimuth and elevation, and apply it to an object.
The resulting SVG code looks something like this:
<filter id="metallic-lighting">
  <feGaussianBlur stdDeviation="10" in="SourceGraphic" result="result0" />
  <feDiffuseLighting diffuseConstant="1" surfaceScale="10" lighting-color="#ffffff">
    <feDistantLight azimuth="205" elevation="45" />
  </feDiffuseLighting>
  <feSpecularLighting specularConstant="0.5" surfaceScale="20" ...>
    <feDistantLight azimuth="205" elevation="45" />
  </feSpecularLighting>
  <feComposite ... />
</filter><filter id="metallic-lighting">
<feGaussianBlur stdDeviation="10" in="SourceGraphic" result="result0" />
<feDiffuseLighting diffuseConstant="1" surfaceScale="10" lighting-color="#ffffff">
<feDistantLight azimuth="205" elevation="45" />
</feDiffuseLighting>
<feSpecularLighting specularConstant="0.5" surfaceScale="20" ...>
<feDistantLight azimuth="205" elevation="45" />
</feSpecularLighting>
<feComposite ... />
</filter>Workflow:
- Draw a shape.
- Open Filter Editor.
- Add lighting primitives.
- Tweak values until it looks right.
Limitation: What if you have 50 objects, and you want them to have slightly different lighting angles, or you want the light color to shift across copies? You would typically need to duplicate the filter definition multiple times and manually tweak each one. If you change the geometry, you might need to adjust the filter coordinates. It is a destructive/static workflow.
AnimGraphLab approach
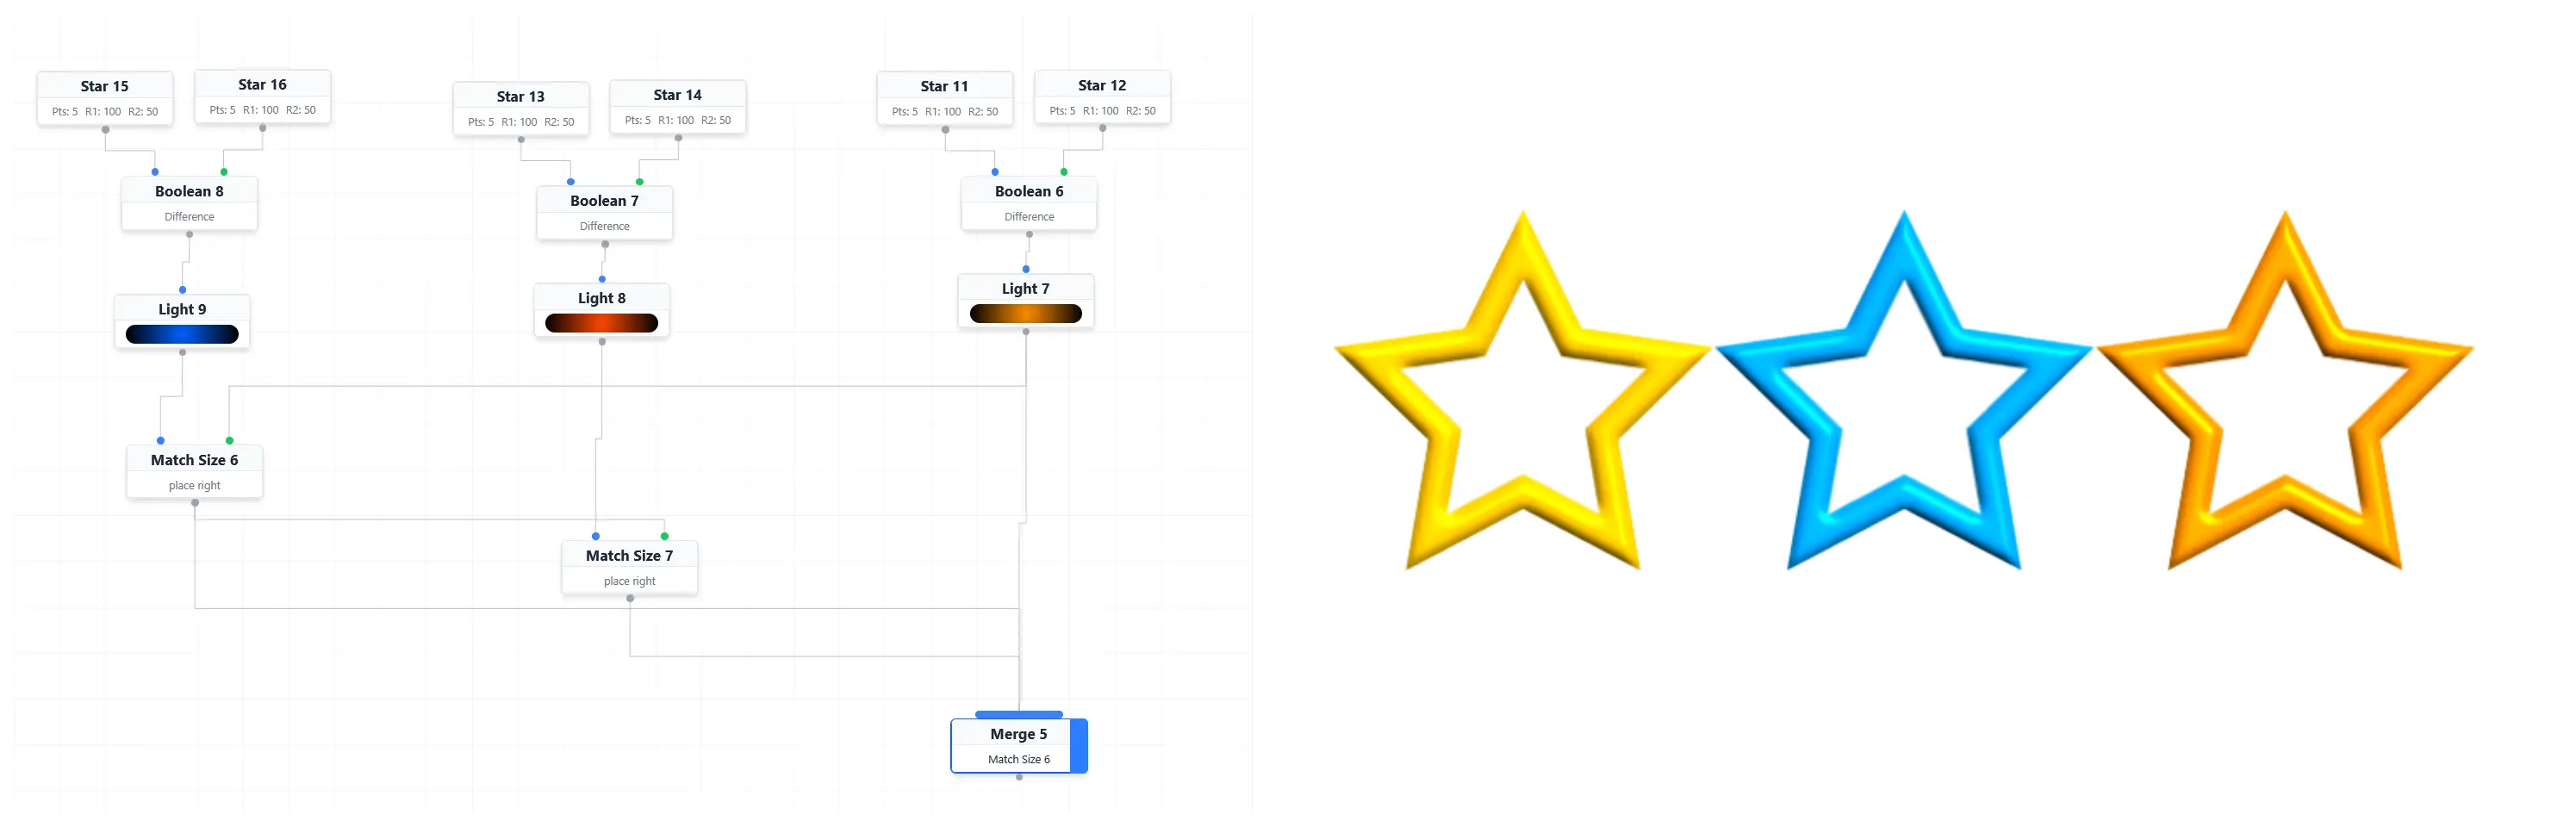
AnimGraphLab don’t treat filter as a static setting attached to an object. Instead, lighting is a Node in the nodegraph that processes incoming (upstream, above it) geometry.
Because AnimGraphLab is procedural, you can separate the shape from the effect:
- Create a Star node.
- Connect it to a Light node.
- Adjust
Color,Azimuth, light color and/or other parameters until satisfied.

So we’re simply told the graph:
Apply a light, but shift color hue (
lightColorparameter) from “X” to “X” color for each shape.”
Part of generated SVG code from example above:
<filter id="a" ...> <feDiffuseLighting lighting-color="#ff6c00" ...> </filter>
<filter id="b" ...> <feDiffuseLighting lighting-color="#dbae00" ...> </filter>
<filter id="c" ...> <feDiffuseLighting lighting-color="#5ddbff" ...> </filter><filter id="a" ...> <feDiffuseLighting lighting-color="#ff6c00" ...> </filter>
<filter id="b" ...> <feDiffuseLighting lighting-color="#dbae00" ...> </filter>
<filter id="c" ...> <feDiffuseLighting lighting-color="#5ddbff" ...> </filter>This doesn’t mean procedural is the only way to do things. You can still do manual assembly like in example below where 3 separate star shapes with different color merged together.
Key differences
1. Reusability vs. Repetition
- Inkscape: Great for crafting a single, perfect master filter. Reusing it on different objects with slight variations requires duplicating the filter definition which may can be time consuming or confusing.
- AnimGraphLab: You define light logic once. That logic can be applied to 1 or 100 shapes. Changing light effect for all shapes is a single slider drag.
2. Context awareness
- Inkscape: filter is unaware of the object’s position in a pattern (correct me if I wrong).
- AnimGraphLab: Light node knows about the geometry. You can say, “If the object is on the left, make the light red. If on the right, make it blue.” or “Color in red all shapes with 15% probability” This can be done via Group node by using bound group/random selection options.
3. Non-destructive editing
- Inkscape: If you weld two shapes together, you might break the way the filter applies to the edges.
- AnimGraphLab: Since lighting is applied downstream in the nodegraph, changing source shapes from a Circle to a Star will update instantly. Similar thing can be done in traditional vector apps but tends to be more time consuming or confusing.
You can copy project from this blog post to your own workspace to explore and play around with.